How to Keep Your Gate Solid After Two GTA Winters
Two winters in Toronto can expose every weakness in a gate. Learn what breaks first, what it costs to fix or replace in 2026, and how to choose materials that survive the GTA freeze-thaw cycle.
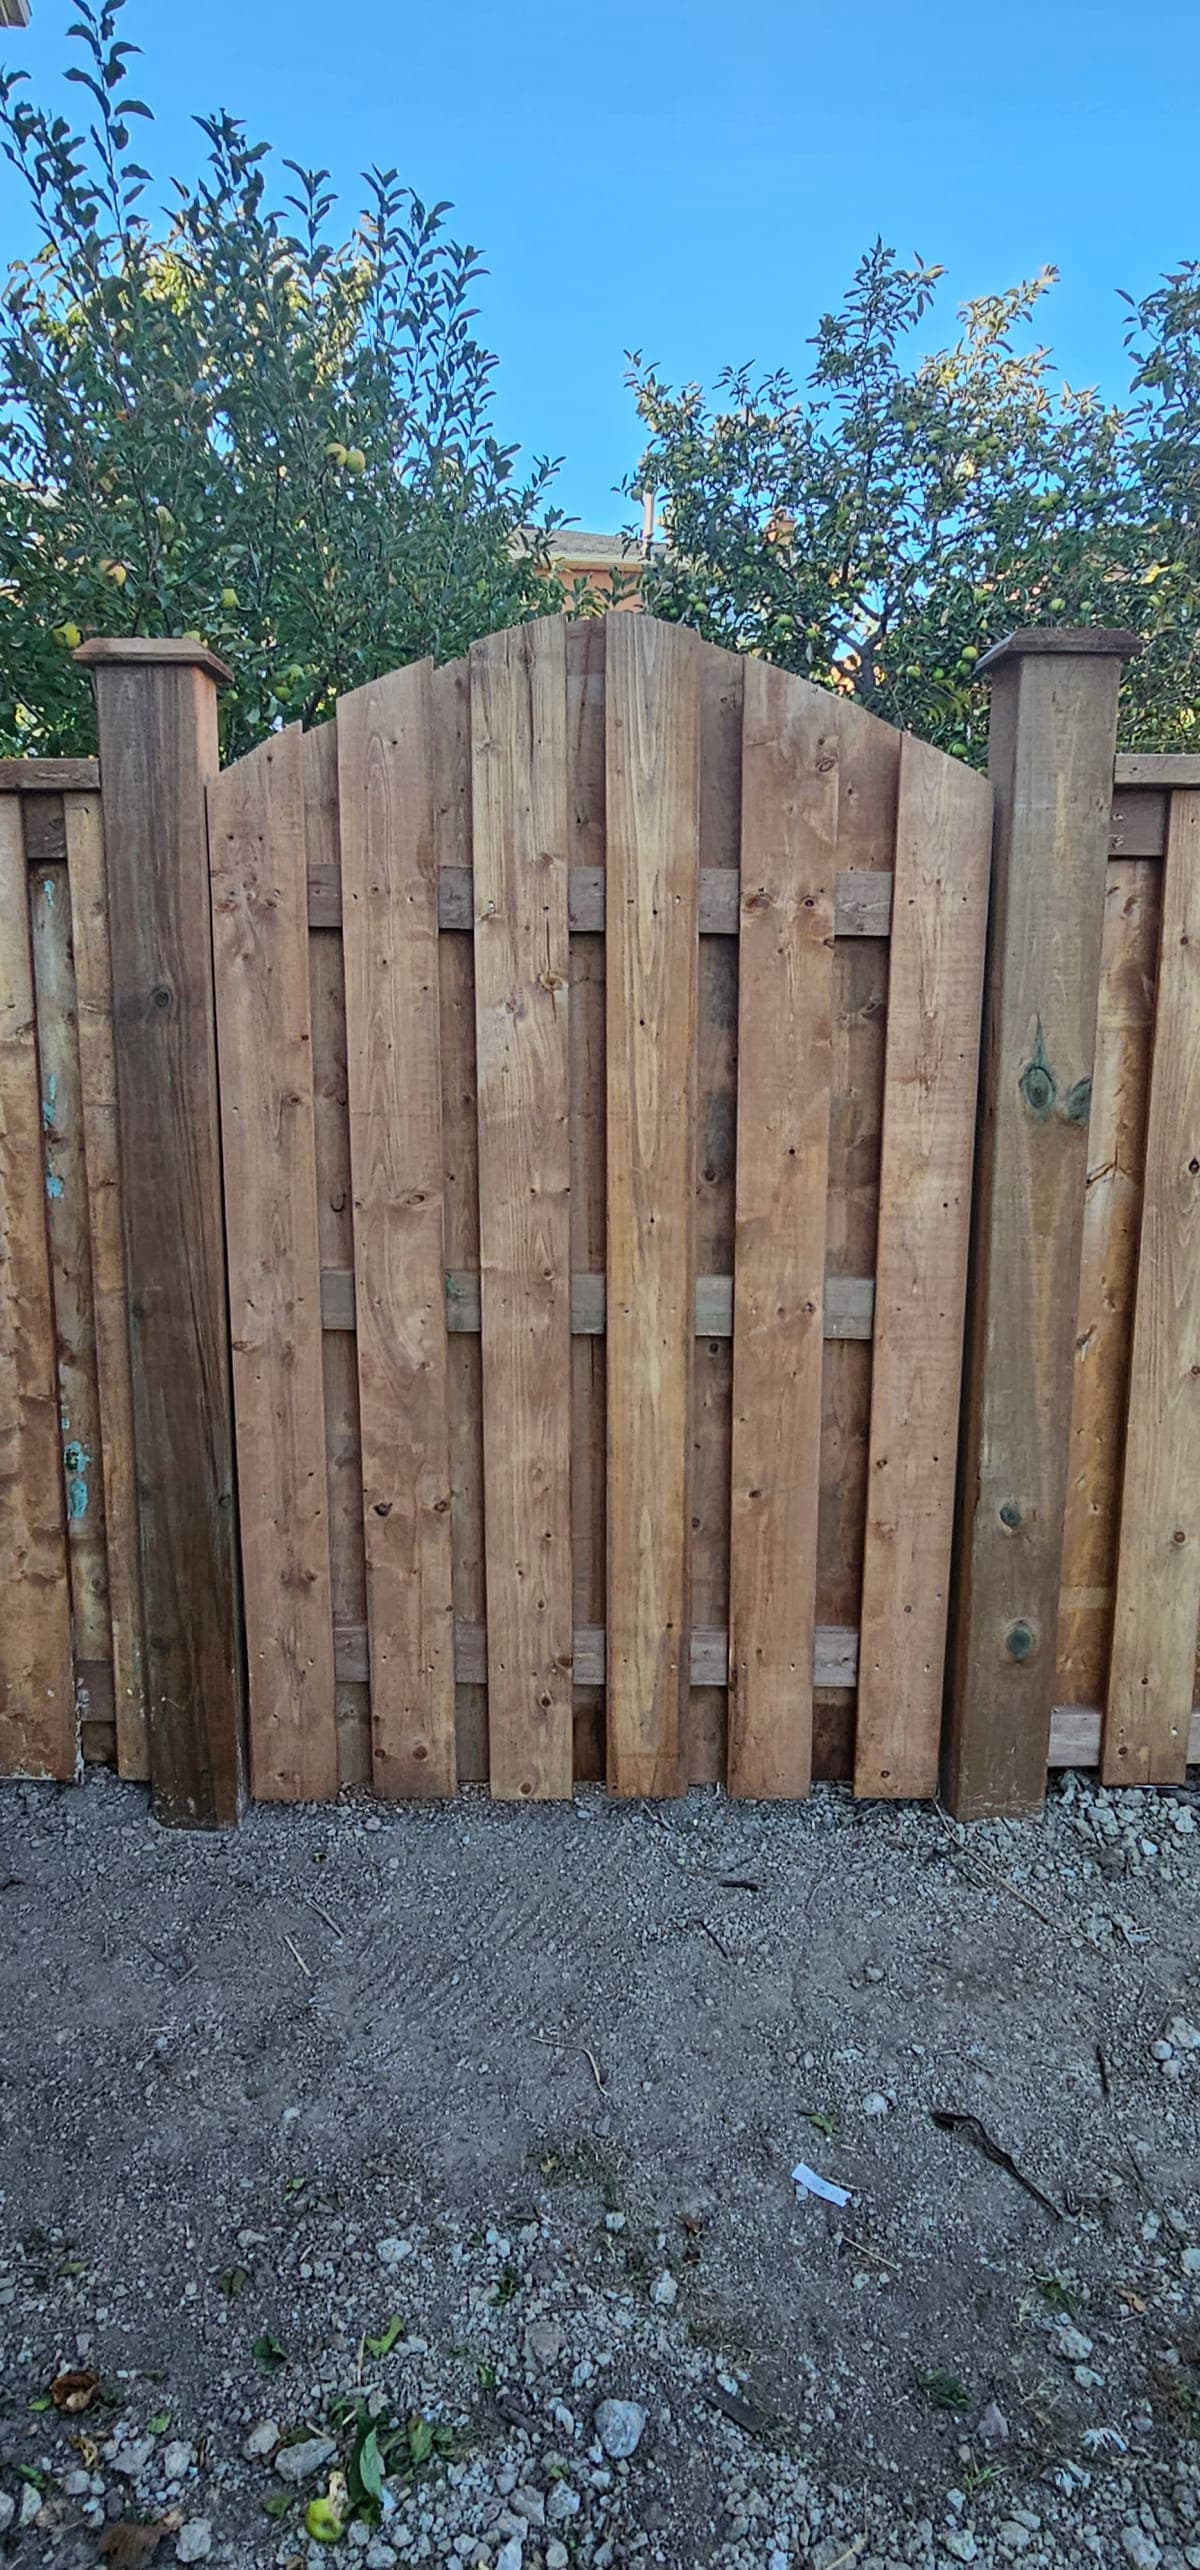
Two winters in Toronto can expose every weakness in a gate — here's what we see most often on jobsites across Mississauga, Vaughan, and Brampton: sagging frames, rotted posts, and hardware that's seized solid by March. According to the Insurance Bureau of Canada, weather-related property damage claims in Ontario have climbed roughly 40% over the past decade, and freeze-thaw damage to fences and gates is one of the most common culprits (Insurance Bureau of Canada, 2024).
If your gate made it through two winters without any attention, it either got lucky or it was built exactly right. Most aren't.
Key Takeaways
- Frost heave and wood rot cause the majority of gate failures in the GTA after two winters
- Minor gate repairs in Toronto run $200–$800 in 2026; full replacement ranges from $800–$4,500 depending on material and size
- Toronto's fence bylaw caps most residential gates and fences at 2.0 m (front yard) and 2.4 m (rear yard) — exceeding those heights requires a permit
- Cedar and aluminum outperform vinyl and untreated wood in GTA freeze-thaw cycles
- Internal drainage and below-frost-line post setting are the two most important factors in gate longevity
Why Do GTA Gates Fail After Two Winters?
Ontario's freeze-thaw cycle is relentless. Environment Canada records an average of 50–70 freeze-thaw events per winter in the Greater Toronto Area, meaning the ground can heave, settle, and shift dozens of times before April (Environment and Climate Change Canada, 2023). That repeated movement cracks mortar, loosens hardware, and slowly wrenches wooden frames out of square.
The two primary failure modes we see every spring are frost heave and wood rot. Frost heave lifts posts out of alignment. Wood rot follows once moisture infiltrates grain-end cuts or ground contact points. Both problems compound each other: a heaved post tilts the gate, which opens new gaps for water to collect.
In our experience servicing gates across Mississauga, Brampton, and Vaughan, posts that were set less than 36 inches deep are responsible for the vast majority of springtime calls we receive. The fix is rarely cheap by that point.
What Frost Heave Actually Does to Your Gate Posts
When water in the soil freezes, it expands by roughly 9% in volume (National Research Council Canada, 2022). That expansion pushes posts upward. When it thaws, the soil doesn't always resettle uniformly, leaving the post sitting higher than it started. Repeat that 50–70 times per winter and even a well-set post can migrate several centimetres out of plumb.
A gate post that's out of plumb by even 10 mm puts constant lateral stress on hinges and the latch strike plate. Hardware rated for decades wears out in two to three seasons under that load.
How Wood Rot Works in Cold Climates
Wood rot is a fungal process. It needs moisture and organic material. Cold slows it, but it doesn't stop it. In the GTA, wood that stays wet through November and March — the shoulder seasons — tends to rot faster than wood exposed to consistent deep cold (Forest Products Laboratory, USDA, 2021).
Grain-end cuts are the most vulnerable point on any gate. They absorb water 40–60 times faster than the face of a board. An unsealed end grain on a post base can show significant decay within a single wet season.
Which Gate Materials Survive GTA Winters Best?
Not all materials age the same way in Toronto's climate. Here's how the most common options compare across the metrics that matter most for GTA homeowners.
| Material | Frost Resistance | Rot / Rust Risk | Avg. Lifespan (GTA) | Maintenance Frequency | 2026 Cost Range (installed) |
|---|---|---|---|---|---|
| Pressure-treated wood | Moderate | Moderate (ground contact) | 10–15 years | Annual sealing | $800–$1,800 |
| Cedar | Good | Low (natural oils) | 15–20 years | Every 2–3 years | $1,200–$2,500 |
| Aluminum | Excellent | Very low | 25–30 years | Minimal | $1,500–$3,500 |
| Galvanized steel | Excellent | Low (if coated) | 20–25 years | Every 3–5 years | $1,800–$4,500 |
| Vinyl/PVC | Good | None | 15–20 years | Low | $1,000–$2,200 |
| Untreated wood | Poor | High | 5–8 years | Frequent | $600–$1,200 |
This table reflects installed cost ranges gathered from ATB Construction project records across Toronto, Mississauga, Vaughan, and Brampton between 2024 and 2026. Prices include materials, hardware, and labour for a standard single-swing residential gate (3–4 ft wide).
Cedar remains our most-requested material for residential gates in the GTA. Its natural oils provide genuine rot resistance, it holds fasteners well through expansion and contraction cycles, and it looks good without paint. Aluminum is the choice when longevity matters more than budget. We've replaced pressure-treated wood gates after 10 years that looked twice their age because of improper sealing.
What Does Gate Repair vs. Replacement Cost in Toronto (2026)?
This is the question we get most often after a long winter. The honest answer is: it depends on what failed and how badly.
According to HomeStars, fence and gate repair is one of the top 10 most-requested contractor services in Ontario each spring, with average project values rising roughly 8% year-over-year since 2022 (HomeStars, 2024). Labour costs in the GTA are higher than the national average, and material costs have stabilized after the supply-chain spikes of 2021–2023.
Minor Repair Costs ($200–$800)
Minor repairs cover problems that don't require replacing the structural skeleton of the gate. Common minor repairs in Toronto include:
- Re-hanging a sagging gate: $200–$350. Usually involves repositioning or upgrading hinges and possibly shimming the post back into plumb.
- Replacing rotted boards or pickets: $250–$500. Labour-intensive but straightforward if the frame and posts are solid.
- Hardware replacement (hinges, latch, strike): $150–$400. Seized or corroded hardware is extremely common after GTA winters.
- Post re-setting (single post, accessible): $300–$600. Digging out and resetting one post with fresh concrete and proper drainage gravel.
Major Repair and Replacement Costs ($800–$4,500)
Once the frame is racked, the post is rotted at grade, or the gate has physically failed at a structural weld or joint, repair costs approach replacement costs. At that point, replacement is often the better financial decision.
- Full gate replacement (wood, 3–4 ft wide): $800–$1,800 installed
- Full gate replacement (cedar, 4–6 ft wide): $1,200–$2,500 installed
- Full gate replacement (aluminum, custom): $1,800–$4,500 installed
- Post replacement including concrete work: $400–$900 per post
We've found that homeowners in Mississauga and Brampton often face higher costs than Toronto proper because of longer drive times and slightly different inspection requirements under Peel Region. It's worth getting quotes that specify travel and permit fees separately.
Do You Need a Permit to Replace a Gate in Toronto?
Toronto's fencing bylaw (Toronto Municipal Code, Chapter 447) sets clear limits that apply to most residential properties. Understanding these rules before you start work can save you a costly stop-work order.
The key thresholds are:
- Front yard fences and gates: Maximum height is 1.0 m (approximately 3.3 ft) in most residential zones. Some corner-lot setback rules apply.
- Side and rear yard fences and gates: Maximum height is 2.0 m (approximately 6.6 ft) without a permit.
- Fences exceeding 2.0 m in rear yards: Require a building permit from the City of Toronto.
- Pool enclosures: Subject to separate safety fencing requirements under the Ontario Building Code regardless of height.
We pull permits on roughly 15–20% of the gate replacement jobs we do in Toronto. It's usually triggered by height, proximity to a right-of-way, or a pool enclosure requirement. The permit fee itself is typically $150–$250 for a residential fence permit in Toronto. The inspection is straightforward if the work is done correctly.
Mississauga, Vaughan, and Brampton follow their own municipal codes, but the height thresholds are broadly similar. Vaughan's Fence Bylaw 047-2017 caps residential fence heights at 2.0 m for rear yards. Brampton references the Ontario Building Code directly for fence permit triggers. Always confirm with the specific municipality before starting work.
How to Prevent Frost Heave in GTA Gate Posts
Prevention is significantly cheaper than repair. Getting the post installation right the first time is the single most impactful step you can take for long-term gate performance in Toronto's climate.
According to the Ontario Building Code, footings for fence posts in Ontario should extend below the frost depth for the region. The frost depth in the Greater Toronto Area is approximately 1.2 m (about 4 ft) (Ontario Ministry of Municipal Affairs and Housing, 2024).
Post Depth and Concrete Setting
The standard we follow is a minimum 48-inch depth for gate posts, with 50–54 inches preferred for taller gates or gates that carry significant daily load (driveways, double gates). For reference:
- Dig the hole to the correct depth before setting.
- Place 4–6 inches of compacted gravel at the base for drainage.
- Set the post and plumb it carefully. Use bracing.
- Fill with concrete to 2–4 inches below grade.
- Crown the top of the concrete slightly so water sheds away from the post.
- Backfill the last 2–4 inches with soil.
Leaving the top of the concrete slightly proud of grade is a mistake we see often. Water pools against the post base and accelerates rot right at the most vulnerable point.
Drainage and Site Selection
Low-lying areas collect water. A gate post sitting in standing water for weeks each spring will rot faster than the same post installed in a well-drained location. Before you install, check whether the area pools after rain. If it does, grade away from the post location or add a perimeter drain.
Wood Rot Prevention: What Actually Works in the GTA
Sealing your gate is not a one-time job. Wood moves with humidity and temperature changes. Seals crack. The GTA's temperature range from -20°C in January to +35°C in July puts more stress on exterior coatings than most climates (Environment and Climate Change Canada, 2023).
Choose the Right Wood from the Start
Cedar is the practical choice for most Toronto homeowners. It contains tannins and natural oils that inhibit fungal growth. Pressure-treated lumber (ACQ or MCQ treated) is appropriate for ground-contact posts, but should not be left bare: the preservative prevents decay but does not prevent weathering and checking.
Never use untreated dimensional lumber for any exterior gate component. We still see it on new builds. It typically shows visible checking within one season and surface rot within two.
Sealing Grain-End Cuts
Every cut you make in the field exposes raw end grain. That end grain must be treated immediately. Use a penetrating end-grain sealer, not just exterior paint. Paint builds a surface film that cracks as the wood moves. A penetrating sealer actually enters the wood fibre.
Budget 15–30 minutes per gate to seal all field cuts before assembly. It's the single fastest return-on-effort step in gate construction.
Annual Maintenance Checklist
Run through this every spring after the last hard freeze in the GTA (typically late March to early April in Toronto):
- Check all posts for plumb. Use a 4-ft level.
- Inspect hinge and latch hardware for corrosion or movement.
- Look for checking or cracking in wood pickets and frame members.
- Re-apply penetrating sealer to any bare wood areas.
- Clear debris from the base of the gate and posts.
- Test gate swing for binding or dragging (early sign of a shifting post).
Repair or Replace: How to Decide
This is where we spend the most time talking with homeowners across Mississauga, Vaughan, Brampton, and Toronto. The decision framework we use is straightforward.
Repair makes sense when:
- The posts are solid and plumb
- The frame is not racked (out of square by more than 10 mm)
- The hardware failure is isolated
- The total repair cost is under 50% of replacement cost
Replace when:
- One or both posts are rotted at grade
- The frame is racked or the weld/joint has failed structurally
- The gate is more than 15 years old and showing widespread wood degradation
- You're upgrading the fence or changing the opening width
Based on our 2024–2026 project data, roughly 60% of spring gate calls in the GTA result in full replacement rather than repair. Homeowners are often surprised by this. The issue is that by the time a gate looks bad enough to call a contractor, the underlying structure has typically been compromised for at least one full season.
Frequently Asked Questions
How long should a gate last in Toronto's climate?
A properly installed cedar gate in Toronto should last 15–20 years with maintenance every two to three years. Aluminum gates can reach 25–30 years with minimal upkeep. Pressure-treated wood typically falls in the 10–15 year range. Gates that were set with posts shallower than the frost depth or used untreated wood often fail within 5–8 years, regardless of the above-grade construction quality (Forest Products Laboratory, USDA, 2021).
What does gate repair cost in Toronto in 2026?
Minor gate repairs in Toronto range from $200 to $800 in 2026. This covers sagging gate re-hanging, board replacement, hardware swaps, and single-post re-setting. Full gate replacement runs $800–$4,500 depending on material (wood, cedar, aluminum, steel) and gate size. request a gate repair quote
Do I need a permit to replace my gate in Toronto?
Most standard residential gate replacements at the same height and location do not require a permit in Toronto. You will need a permit if the gate or fence exceeds 2.0 m in rear yards, is located within a specific setback zone, or forms part of a pool enclosure. Permit fees typically run $150–$250 for residential fence work in Toronto. Always confirm with the City of Toronto Building Division before starting work.
Why does my gate sag every spring in Mississauga or Brampton?
Spring sagging is almost always caused by frost heave. If your gate posts were not set below the 1.2 m frost depth or lacked proper gravel drainage at the base, the freeze-thaw cycle gradually tilts and shifts them. Each winter the problem compounds. By spring, the misalignment shows up as a gate that drags, won't latch, or sits visibly crooked. The permanent fix is resetting the posts correctly, not adjusting the hinges.
How much does it cost to reset a fence post in Vaughan or Brampton in 2026?
Resetting a single gate post in the GTA typically costs $400–$900 in 2026, depending on access, concrete removal, and post size. If the post itself is rotted and needs replacement, add $150–$300 for material. Double-gate posts (which carry more load) are at the higher end. Some municipalities in Peel Region also require inspection sign-off for structural post work, which can add $100–$200 to the total.
The Bottom Line for GTA Homeowners
Two winters are usually enough to reveal every shortcut taken during gate installation. The most common problems we fix across Toronto, Mississauga, Vaughan, and Brampton — frost-heaved posts, rotted end grain, seized hardware — are almost entirely preventable with proper material selection, below-frost-line post depth, and annual maintenance.
If you're assessing a gate that's already showing problems, use the 50% rule: if repair costs more than half the replacement cost, replace. If you're starting fresh, invest in cedar or aluminum, set your posts at 48 inches minimum, and seal every cut you make in the field.
Prices in 2026 are running $200–$800 for minor repairs and $800–$4,500 for full replacement across the GTA. Getting two or three quotes that break out labour, materials, and any permit fees separately will give you the clearest picture of what the job actually costs.
If you're not sure whether your gate needs repair or full replacement, ATB Construction's gate and fence team offers assessments across the GTA including Toronto, Mississauga, Vaughan, and Brampton. We've been doing this work through GTA winters long enough to know what holds and what doesn't.
Tags
Related articles
Why Most Outdoor Lighting Goes South After Two Winters and How to Stop It
Get the lowdown on why your outdoor lighting fails after a couple of winters in wet, cold spots. Learn the tricks to prevent frost heave and wood rot so your setup lasts the long haul.
Why Most Porch Builds Fail After Two Winters and How to Stop It
Most porches that fall apart after two winters share the same issues: frost heave and wood rot. Here's what you need to know to build a porch that lasts through Canada's wet, cold seasons.
How to Winterize Outdoor Lighting in Toronto & the GTA
GTA winters destroy poorly installed outdoor lighting inside two seasons. This guide covers frost-proof footings, ESA permit requirements, 2026 pricing, and why LED beats every alternative when temperatures drop below -20°C in Toronto, Mississauga, Vaughan, and Brampton.