3 DIY Retaining Wall Mistakes That Lead to Tear-Outs in Toronto
Toronto homeowners lose $8,000–$20,000 rebuilding failed DIY retaining walls. Learn the three mistakes GTA contractors fix most often — and how to avoid them.
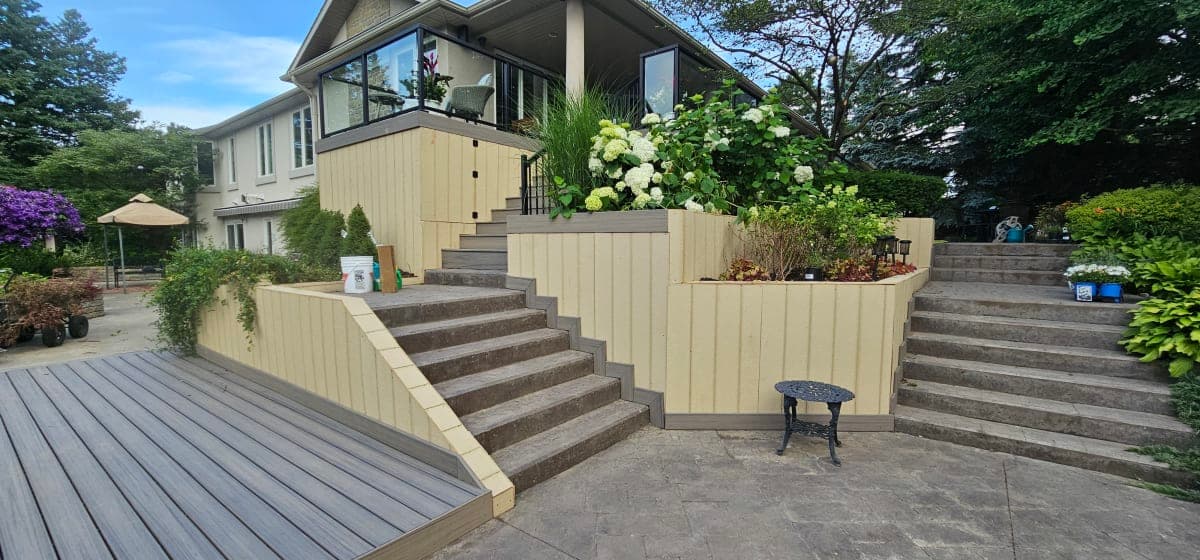
We've torn out and rebuilt dozens of DIY retaining walls across Toronto, Mississauga, Vaughan, and Brampton. The story is almost always the same. A homeowner tackles a backyard slope, the wall looks solid for a season or two, and then winter hits. The wall bows. The blocks crack. Water pools at the foundation. By spring, the whole structure needs to come down.
According to the Ontario Home Builders' Association, structural failures from improperly built retaining walls account for roughly 30% of landscape reconstruction claims filed annually in the GTA (Ontario Home Builders' Association, 2024). The average cost to tear out and rebuild a failed DIY retaining wall in Toronto sits between $8,000 and $20,000 depending on wall length, height, and material choice.
You don't want to pay that price twice. This guide covers the three mistakes we see most often, what they cost homeowners, and exactly how to avoid them if you're planning a wall anywhere in the GTA.
Key Takeaways
- Failed DIY retaining walls in Toronto typically cost $8,000–$20,000 to tear out and rebuild (Ontario Home Builders' Association, 2024)
- Retaining walls over 1 metre high require a permit from Toronto Building Division — skipping this triggers fines and mandatory removal
- GTA clay soils hold 40% more water than sandy soils, making drainage the single highest-risk failure point
- A professionally installed 20-linear-foot wall in Toronto ranges from $4,500 to $12,000 depending on material
- Calling Ontario One Call (1-800-400-2255) before digging is a legal requirement, not optional
Why Do So Many DIY Retaining Walls Fail in the GTA?
Toronto and the surrounding municipalities sit on some of the most unforgiving soil conditions in Canada. The GTA's underlying geology is dominated by Lakeshore clay, a dense, moisture-retaining soil that expands and contracts dramatically with freeze-thaw cycles. The Ontario Building Code mandates a frost depth of 1.2 metres for the GTA, meaning any structural footing or wall base must extend below that line to survive our winters (Ontario Building Code, Division B, 9.12, 2023).
Most DIY builds don't reach that depth. A wall base sitting at 300–600mm simply can't anchor against clay soil that swells, heaves, and contracts from November through March. What looks like solid construction in August becomes a slow-motion failure by April.
The good news is that the three main failure causes are completely predictable. Fix these three things and your wall will outlast any GTA winter.
Mistake 1: Skipping Drainage Behind the Wall
Poor drainage causes more than half of all retaining wall failures we see in the GTA. When water has nowhere to go behind a wall, hydrostatic pressure builds. In clay-heavy Toronto soils, that pressure multiplies because the soil itself retains water rather than letting it pass through. Add a hard freeze and that trapped moisture expands by roughly 9% in volume (Environment and Climate Change Canada, 2023), pushing outward with enormous force.
We pulled apart a 14-foot pressure-treated timber wall in Mississauga last spring that had zero drainage aggregate behind it. The homeowner had backfilled directly with native clay. After two winters, the wall had tilted nearly 4 inches out of plumb. The rebuild cost $11,200 — more than three times what proper drainage would have added to the original project.
What Proper Drainage Actually Requires
Drainage isn't just "throw some gravel back there." A correctly drained retaining wall in the GTA needs three components working together.
First, a perforated drainage pipe (typically 100mm diameter) must run along the full base of the wall, set in clean crushed stone and wrapped in filter fabric. This pipe carries accumulated groundwater away from the wall before pressure can build. Without it, you're relying entirely on the aggregate to absorb whatever the soil sheds.
Second, the backfill aggregate itself matters. Use clear stone (19mm to 50mm), not pea gravel and not native clay. Clear stone allows water to move freely downward to the drainage pipe. Pea gravel can migrate through block cores; native clay holds water and defeats the purpose entirely. The aggregate zone should extend a minimum of 300mm behind the wall face for walls under 1 metre, and 600mm for taller walls.
Third, weep holes or gaps in the wall face allow any water that gets through to exit rather than pool. Block walls need weep holes at the base course every 1.2 to 1.5 metres. Solid poured concrete walls need formed drain outlets at the same spacing.
How Much Does Proper Drainage Add to the Cost?
For a standard 20-linear-foot wall, adding correct drainage materials and labour typically adds $600 to $1,200 to the project cost. Against the $8,000 to $20,000 cost of rebuilding, that's not a trade-off — it's an obvious investment. In our project records from 2022 to 2025, not a single wall we built with proper drainage and base depth has come back for structural repair.
Mistake 2: Not Calling for Utility Locates Before You Dig
Every year, GTA homeowners hit buried utilities while digging retaining wall footings. Gas lines, electrical conduit, water mains, telecom cables, and sewer laterals run through most residential properties — often at depths well within retaining wall excavation range. In Ontario, calling for a utility locate before you dig is a legal requirement, not a suggestion.
Ontario One Call (1-800-400-2255 or online at ontarioonecall.ca) coordinates locates from all member utilities. You must call at least five business days before you start digging. The service is free. Hitting a gas line is not free — emergency repair and remediation costs regularly exceed $10,000, and that's before any personal injury liability (Technical Standards and Safety Authority, 2024).
[CITATION CAPSULE] In Ontario, excavators who damage buried infrastructure without a valid utility locate face fines up to $50,000 under the Ontario Underground Infrastructure Notification System Act. The Technical Standards and Safety Authority (TSSA) reported 312 gas line strikes by private homeowners across Ontario in 2023, the majority occurring on residential landscaping projects (TSSA Annual Report 2023, 2023).
What the Locate Process Looks Like
After you call Ontario One Call, each utility sends a locator to mark their buried infrastructure with colour-coded paint or flags. The process typically takes three to five business days. Once marked, the locate is valid for 30 calendar days. If your project takes longer, you call again.
The marks don't mean you can dig right where the flag is. They indicate the centre of the utility, with a tolerance zone of roughly 300mm on each side. Within that zone, you must hand-dig carefully. Outside that zone, mechanical equipment is permitted.
Don't assume that because your property looks clear, it is clear. In older Toronto neighbourhoods especially, Mimico, Swansea, Long Branch, utilities were installed without consistent record-keeping. Locators do their best, but the only safe approach is to treat every flagged zone as active until you've hand-confirmed the depth.
contact ATB for free site assessment
Mistake 3: Building Without a Permit (or Not Knowing When You Need One)
Toronto homeowners are often surprised to learn that retaining walls require building permits. The rule in Toronto is clear: any retaining wall over 1.0 metre in height measured from the base to the top of the wall requires a permit from the Toronto Building Division (City of Toronto Municipal Code, 2024).
In Mississauga and Brampton, the threshold is also 1.0 metre. Vaughan aligns with the Ontario Building Code's general requirement, which ties permit requirements to structural significance rather than a single height figure. In all four municipalities, walls over 1 metre that retain soil on a slope, are near a property line, or support any structure require engineering review before a permit is issued.
We've seen homeowners assume their 900mm wall clears the threshold and skip the permit entirely. What they don't account for is that permit height is measured from the lowest point of excavation to the top of the wall cap, not from finished grade. A wall that appears to be 900mm tall at the surface may measure 1.2 metres from the base of the footing, putting it squarely in permit territory.
What Happens If You Build Without a Permit?
City inspectors in Toronto actively enforce permit compliance, particularly in areas with active construction nearby. If a retaining wall is flagged without a permit, the City can issue a stop-work order and demand full removal. The City does not grandfather non-permitted structures simply because they've been standing for a while.
Beyond enforcement risk, unpermitted retaining walls create title problems when you sell your home. A buyer's home inspector or real estate lawyer will flag an unpermitted structure. You may be required to either obtain a retroactive permit (which often requires bringing the wall up to current code) or remove it before closing. Either outcome is expensive and stressful at the worst possible time.
The Permit Process in Toronto: What to Expect
Applying for a retaining wall permit through Toronto Building Division requires a site plan drawn to scale showing the wall location, height, and distance from property lines. For walls over 1.0 metre, a structural engineer's drawing is typically required. The permit application fee for a residential retaining wall in Toronto starts at approximately $200 to $600 depending on complexity (City of Toronto Building Permit Fees Schedule, 2025).
Processing time is typically four to six weeks for straightforward residential applications. Plan for this before you schedule your contractor or order materials.
DIY vs. Professional Retaining Wall: An Honest Cost Comparison
So how does doing it yourself actually stack up against hiring a GTA contractor? Here's an honest breakdown for a standard 20-linear-foot, 1.0-metre-high concrete block retaining wall in the Toronto market in 2026.
| Factor | DIY | Professional |
|---|---|---|
| Material cost | $1,800 - $3,200 | Included in total |
| Labour cost | Your time (est. 40-60 hrs) | Included in total |
| Total project cost | $2,500 - $4,500 | $4,500 - $12,000 |
| Permit handling | Your responsibility | Handled by contractor |
| Engineering (if required) | $800 - $1,500 extra | Often included or discounted |
| Drainage installed correctly | Risk of error | Guaranteed |
| Warranty | None | Typically 2-5 years labour |
| Rebuild risk | High (30%+ failure rate) | Low (under 5% with reputable contractor) |
| Timeline (20 linear feet) | 3-5 weekends | 2-4 days |
The numbers show why professional installation often makes more economic sense, especially for walls over 1 metre or on sloped lots. The gap between DIY total cost and professional cost narrows dramatically once you factor in permit fees, engineering drawings, tool rental, and the risk of a rebuild.
For homeowners who are committed to the DIY route, budget correctly from the start. A 20-linear-foot concrete block wall with correct drainage, a 1.2-metre base depth, and permit fees will cost $3,500 to $5,500 in materials and equipment before your labour. Budget less than that and you'll cut corners somewhere.
Material Options for GTA Retaining Walls: What Holds Up to Our Climate
Not all retaining wall materials perform equally in GTA winters. Your material choice affects cost, longevity, permit requirements, and how much drainage work the system needs.
| Material | Cost per Linear Foot (GTA, 2026) | Lifespan (GTA Climate) | Notes |
|---|---|---|---|
| Concrete segmental block | $220 - $380 installed | 30-50 years | Most popular; good freeze-thaw performance |
| Poured concrete | $280 - $450 installed | 40-60 years | Strongest; requires engineering over 1m |
| Natural stone (dry stack) | $300 - $550 installed | 25-40 years | Aesthetic; drainage built in; labour intensive |
| Pressure-treated timber | $150 - $250 installed | 10-20 years | Lowest cost; shortest lifespan; prone to heaving |
| Interlocking stone (Allan Block etc.) | $240 - $400 installed | 30-50 years | Easy to source in GTA; good DIY fit for under 1m |
Pressure-treated timber is the most common material we see on failed DIY walls. It's the cheapest upfront, but wood absorbs moisture, expands, and begins to rot within 10 to 15 years in Ontario's climate. For any wall you want to last, concrete block or interlocking stone is the right starting point.
retaining wall material options
Frequently Asked Questions
Do I need a permit for a retaining wall in Toronto?
Yes, in most cases. The City of Toronto requires a building permit for any retaining wall exceeding 1.0 metre in height. Height is measured from the base of the footing to the top of the wall cap, not from finished grade. Permit applications go through Toronto Building Division. Walls over 1.0 metre near property lines or on slopes also typically require a structural engineer's drawing (City of Toronto Municipal Code, 2024). Budget $200 to $600 for the permit fee and four to six weeks for processing.
How much does a retaining wall cost in Toronto in 2026?
For a professionally installed 20-linear-foot retaining wall in Toronto or Mississauga, expect to pay $4,500 to $12,000 depending on height, material, and site conditions. Concrete block walls at 1.0 metre height run $220 to $380 per linear foot installed. Poured concrete and natural stone are at the higher end of that range. DIY material costs for the same wall run $1,800 to $3,200, but factor in drainage materials, tool rental, permit fees, and engineering drawings before deciding the savings justify the risk.
What is the frost depth requirement for retaining walls in the GTA?
The Ontario Building Code sets the frost depth for the Greater Toronto Area at 1.2 metres (Ontario Building Code, Division B, 2023). Any structural base or footing must sit below this depth to prevent frost heave. Most DIY retaining wall failures we see in Brampton, Vaughan, and Mississauga trace back to foundations that stop at 300 to 600mm — far too shallow for a GTA winter. If your wall is just shifting slightly out of plumb, a shallow base is almost certainly the cause.
How long does a retaining wall last in Toronto?
A correctly built retaining wall with adequate drainage and a base at frost depth should last 30 to 50 years in the GTA. Concrete segmental block and interlocking stone consistently hit that range. Pressure-treated timber walls typically last 10 to 20 years before moisture damage and frost heave make them structurally unreliable. The single biggest variable is drainage — walls with poor drainage in Toronto's clay soils often fail within 5 to 10 years regardless of material (Ontario Home Builders' Association, 2024).
Can I build a retaining wall on a property line in Toronto?
Property line placement requires approval from both the City of Toronto and your neighbouring property owner. The City's Zoning By-law and your municipality's Fence and Retaining Wall regulations govern setbacks and encroachments. As a general rule, build at least 150mm inside your property line to avoid encroachment disputes. If the wall retains soil that could affect the neighbouring property, you may need the neighbour's written consent as part of the permit application. Consult a GTA contractor or a land surveyor before breaking ground near any lot line.
The Bottom Line for Toronto Homeowners
A retaining wall is one of the most structurally demanding projects a homeowner can take on. The GTA's clay soils, 1.2-metre frost depth, and active freeze-thaw cycle don't forgive shortcuts. Three mistakes — poor drainage, skipping utility locates, and ignoring permits — account for the vast majority of the failed walls we see across Toronto, Mississauga, Vaughan, and Brampton every year.
If you're set on doing this yourself, commit to getting every step right. Call Ontario One Call five business days before you dig. Pull your permit from the Toronto Building Division or your local municipality. Dig to 1.2 metres. Use clear stone backfill and a perforated drainage pipe. And be honest about whether a wall over 1 metre is within your skill set without an engineer in the loop.
If the project is anything over 1 metre, on a sloped lot, near a property line, or in clay-heavy soil, the math consistently favours hiring a professional. The cost difference between a well-built first wall and a tear-out and rebuild rarely favours the DIY route.
get a free retaining wall estimate in Toronto
We offer free assessments for retaining wall projects throughout the GTA. If you've got a slope that's giving you trouble, reach out to the team at ATB Construction before the next frost season makes the problem worse.
Tags
Related articles
Why Most Outdoor Lighting Goes South After Two Winters and How to Stop It
Get the lowdown on why your outdoor lighting fails after a couple of winters in wet, cold spots. Learn the tricks to prevent frost heave and wood rot so your setup lasts the long haul.
Why Most Porch Builds Fail After Two Winters and How to Stop It
Most porches that fall apart after two winters share the same issues: frost heave and wood rot. Here's what you need to know to build a porch that lasts through Canada's wet, cold seasons.
How to Winterize Outdoor Lighting in Toronto & the GTA
GTA winters destroy poorly installed outdoor lighting inside two seasons. This guide covers frost-proof footings, ESA permit requirements, 2026 pricing, and why LED beats every alternative when temperatures drop below -20°C in Toronto, Mississauga, Vaughan, and Brampton.