3 Deck Mistakes That Will Make You Rip It Out (Toronto & GTA Guide)
Toronto homeowners spend $10,000–$30,000 rebuilding decks that failed within 3 years. Learn the 3 mistakes GTA contractors see most and how to avoid them.
We've rebuilt decks across Toronto, Mississauga, Vaughan, and Brampton after homeowners made these exact mistakes. Some of those jobs cost families $12,000 to $28,000 to fix, money they never planned to spend. The frustrating part is that every single teardown was preventable. Three errors account for the vast majority of failed decks we see across the GTA, and this guide walks through each one in plain language.
Key Takeaways
- Toronto requires a building permit for any deck over 10 m² or attached to the house — skipping it risks forced removal
- GTA frost depth is 1.2 m (roughly 4 ft); shallow footings are the single leading cause of deck failure in Ontario
- Pressure-treated lumber costs $8,000–$14,000 for a 200 sq ft deck in Toronto; composite runs $16,000–$28,000
- Most deck failures we see in the GTA trace back to one of three mistakes: no permit, wrong footings, wrong materials
- Fixing these three issues before you build is far cheaper than rebuilding after the first winter
Why Do Toronto Decks Fail So Often?
According to the City of Toronto Building Division, hundreds of unpermitted decks are flagged for removal every year in the city alone. (City of Toronto Building Division, 2025). We see the pattern constantly: a homeowner builds in the summer, the deck looks solid through fall, and then two or three freeze-thaw cycles do their damage. By year two or three the posts are heaving, the boards are separating, and there's no safe way forward except to tear it out and start over.
The GTA's climate is genuinely hard on outdoor structures. Toronto averages around 30 freeze-thaw cycles per year (Environment and Climate Change Canada, 2024), which puts relentless pressure on footings, fasteners, and decking boards. That's not an excuse for poor work. It's a reason to understand what the climate demands before you build.
Over the past decade working across the GTA, we've found that the clients who avoid teardown situations share one thing in common: they treated the planning phase as seriously as the building phase. They got permits, they asked about frost depth, and they chose materials for longevity rather than upfront cost savings. The clients who ended up calling us to rebuild? Almost always, they skipped at least one of those three things.
Mistake 1: Skipping Permits and Utility Locates
This is the most common and most expensive mistake we see in Toronto. The City of Toronto Building Division requires a building permit for any deck that is attached to the house or exceeds 10 square metres (roughly 108 square feet) in area (City of Toronto Municipal Code, Chapter 363, 2024). Mississauga, Vaughan, and Brampton have similar thresholds under the Ontario Building Code.
[CITATION CAPSULE] The City of Toronto requires a building permit for any deck over 10 m² or attached to the house. Permit fees in Toronto typically run $200–$500 for residential decks depending on scope (City of Toronto Building Division, 2025). Building without a permit risks a stop-work order, forced removal, and fines up to $100,000 under the Ontario Building Code Act.
Many homeowners assume a small deck doesn't need a permit. That assumption costs them dearly. If a deck built without a permit is later flagged — often during a home sale inspection — the municipality can order a full removal. We've seen families lose $15,000 to $22,000 in unpermitted deck work that had to come down before a sale could close.
What the Permit Process Looks Like in Toronto
Getting a permit is not complicated, but it does take planning. You submit drawings showing the deck dimensions, footing placement, and structural details to the City of Toronto's Building Division. Processing typically takes 10–20 business days for straightforward residential projects. The permit fee for a standard residential deck in Toronto runs approximately $200–$500 depending on the project value (City of Toronto Building Division Schedule of Fees, 2025).
Once the permit is issued, you'll need at least one inspection — usually for footings before concrete is poured, and a final inspection once framing is complete. It's a modest amount of paperwork for a structure that needs to last 15 to 25 years.
Why Utility Locates Matter as Much as Permits
Before any digging begins, you must contact Ontario One Call (1-800-400-2255 or ontarioonecall.ca) to have underground utilities marked. This is a legal requirement under Ontario's Occupational Health and Safety Act (Ontario One Call, 2024). Gas lines, water mains, and electrical conduits run under yards across Toronto, Mississauga, and Brampton in patterns that aren't always intuitive. Hitting a gas line during footing excavation is a life-safety issue, not just a construction delay.
The locate service is free and must be requested at least three business days before digging. There's no good reason to skip it.
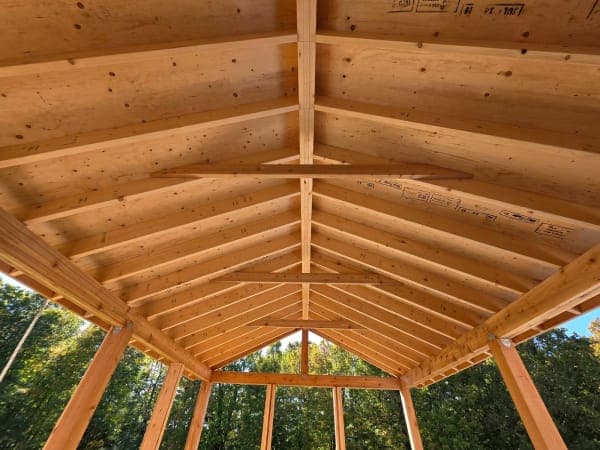
Mistake 2: Footings That Aren't Deep Enough for GTA Frost
Shallow footings are the single leading structural cause of deck failure in Ontario. The Ontario Building Code requires footings to extend below the frost line, which is 1.2 metres (approximately 4 feet) across most of the GTA (Ontario Building Code, Division B, Part 9, 2024). Footings that stop at 2 or 3 feet will heave during freeze-thaw cycles, pushing posts out of alignment and cracking the entire deck frame.
[CITATION CAPSULE] Ontario Building Code Part 9 requires deck footings to extend below the local frost depth. In Toronto and the GTA, the minimum frost depth is 1.2 m (4 ft) (Ontario Building Code Division B, 2024). Footings that fall short of this depth will move seasonally, causing structural failure within 2 to 5 years in most GTA climates.
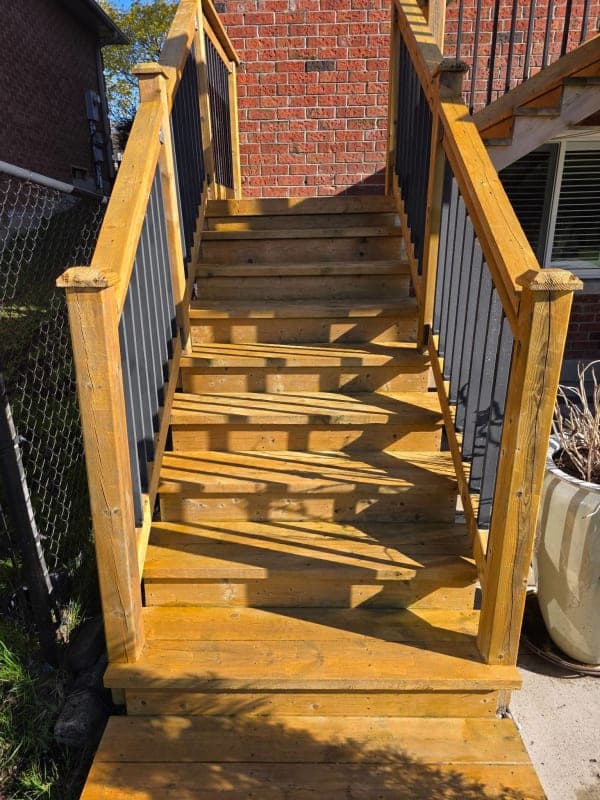
We've seen beautiful-looking decks reduced to angled, unusable platforms after a single harsh winter because the builder dug only 18 to 24 inches down. The posts heaved unevenly, the ledger board pulled away from the house, and the stair stringers cracked. Total replacement cost for a 300 sq ft deck in that condition runs $18,000 to $26,000 in the Toronto market (2026 estimate based on material and labour costs).
Choosing the Right Footing Type
Several footing systems work well in the GTA climate, each with trade-offs.
Poured concrete piers are the most common choice. Cardboard tube forms are set at or below the 1.2 m frost line, filled with concrete, and a post anchor is embedded before the concrete sets. This is the standard approach for most residential decks in Toronto and Mississauga.
Helical piles are a premium option that screw into the ground below frost depth. They're faster to install and don't require excavation. For decks near structures, on sloped lots, or in areas with poor soil conditions, helical piles often make more sense. In the GTA, helical pile installation typically costs $400–$700 per pile, compared to $150–$300 per poured concrete pier (HomeStars Canada Contractor Survey, 2025).
Pre-cast concrete blocks ("deck blocks") placed on the surface are not suitable as the sole footing in Ontario's climate. They sit on the soil surface and will shift every winter. We only see them used appropriately as supplemental interior supports where the primary perimeter footings are already below frost depth.
Soil Conditions Across the GTA
Soil type matters as much as depth. Clay-heavy soils — common across large parts of Toronto, Scarborough, and Mississauga — retain moisture and expand more aggressively during freeze cycles than sandy soils. If your lot has clay soil, err on the side of slightly wider pier diameters (10 or 12 inches rather than 8 inches) to distribute the load across a larger bearing area.
In our projects across the GTA, clay-soil sites require footing diameters at least 25% wider than standard to avoid seasonal micro-movement that gradually loosens post anchors over 3 to 5 years. We've standardized on 12-inch diameter piers for all Toronto-area clay-soil sites regardless of deck size.
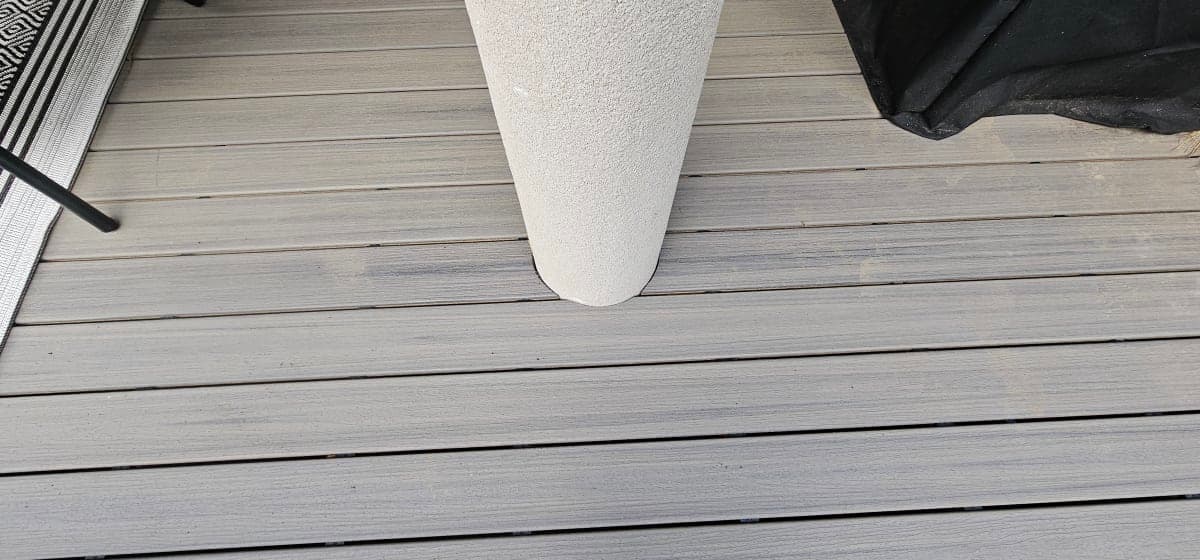
Mistake 3: Using the Wrong Materials for GTA's Climate
Material choice is where the gap between a 5-year deck and a 20-year deck is decided. Toronto's climate cycles between -20°C winters and +35°C summers, a swing of 55 degrees that tests every fastener, board, and finish on a deck's surface (Environment and Climate Change Canada, 2024). Using untreated lumber or interior-grade fasteners in this environment produces predictable failure: rot, splitting, and structural corrosion within 3 to 7 years.
[CITATION CAPSULE] Canadian Wood Council data shows pressure-treated lumber rated for ground contact (UC4B) outperforms untreated SPF lumber by roughly 4 to 5 times in outdoor lifespan in Ontario's climate (Canadian Wood Council, 2023). In GTA conditions, untreated lumber used for decking boards typically shows visible rot within 3 to 5 years without aggressive annual sealing.
Decking Material Comparison for Toronto Homeowners
The table below compares the three most common decking options we install across Toronto, Mississauga, Vaughan, and Brampton. Costs are 2026 Toronto-market estimates for a 200 sq ft deck including labour and materials.
| Material | Installed Cost (200 sq ft) | Lifespan in GTA Climate | Maintenance | Best Use Case |
|---|---|---|---|---|
| Pressure-Treated Lumber | $8,000–$14,000 | 15–25 years (with sealing) | Annual sealing, inspect fasteners yearly | Budget-conscious builds, traditional look |
| Cedar | $12,000–$20,000 | 15–20 years | Semi-annual sealing, natural oils help | Premium natural look, good rot resistance |
| Composite (e.g., Trex, Fiberon) | $16,000–$28,000 | 25–30 years | Low — wash annually, no sealing needed | Low-maintenance priority, high-use decks |
| PVC Decking | $18,000–$30,000 | 30+ years | Minimal — rinse periodically | Waterfront properties, high-moisture areas |
Fasteners: The Detail Most DIYers Get Wrong
Even if decking boards are the right material, the wrong fasteners will fail within a few years. Standard zinc-plated screws will corrode in the ACQ (alkaline copper quaternary) treatment used in modern pressure-treated lumber. The treatment is corrosive to standard hardware. You need hot-dipped galvanized, stainless steel, or coated screws rated for ACQ-treated lumber (Canadian Wood Council Fastener Guide, 2023).
The same rule applies to joist hangers, post bases, and all structural hardware. If the metal hardware rusts, it loses structural capacity before the wood around it shows any visible problems. We've opened up decks in Brampton and Vaughan where the joist hangers had lost more than half their cross-section to rust while the boards above looked perfectly fine.
DIY vs. Professional Build: When Does Each Make Sense?
A skilled DIYer with carpentry experience can build a ground-level, freestanding deck in Toronto successfully — if they pull the permit, go deep enough on footings, and use proper materials. The honest truth is that most deck failures we rebuild were not built by people who lacked skill. They were built by people who skipped the planning steps.
| Factor | DIY | Professional |
|---|---|---|
| Permit responsibility | Homeowner must apply and manage | Contractor typically manages |
| Footing inspection | You arrange with Building Division | Contractor coordinates |
| Material sourcing | You source and transport | Contractor handles |
| Warranty | None | Typically 1–5 year workmanship warranty |
| Cost (200 sq ft pressure-treated) | $4,000–$7,000 (materials + fees) | $8,000–$14,000 (turnkey) |
| Timeline | Weekends over 4–8 weeks | 5–10 business days |
| Risk of teardown | Higher without construction experience | Lower with licensed contractor |
professional deck building services in Toronto
The permit and inspection process actually works in a DIYer's favour. Building inspectors catch footing problems before concrete is poured, which is exactly when they're free to fix. If you're doing it yourself and the inspector flags a problem, you've saved yourself a teardown.
What a Professional Deck Build Costs in Toronto (2026)
Pricing across the GTA varies by material, size, and site complexity. The ranges below reflect 2026 market rates for Toronto, Mississauga, Vaughan, and Brampton based on our active project pricing.
- Ground-level pressure-treated deck, 150–200 sq ft: $8,000–$14,000 installed
- Elevated deck (attached to house), 200–300 sq ft, pressure-treated: $14,000–$22,000 installed
- Composite deck, 200 sq ft, ground-level: $16,000–$24,000 installed
- Multi-level deck with stairs and railing, 300–400 sq ft: $22,000–$38,000 installed
- Toronto building permit fee: $200–$500 (separate, homeowner or contractor applies)
- Helical pile footings (per pile): $400–$700 installed
These figures include design, permit coordination, materials, labour, and cleanup. They do not include custom features like built-in seating, lighting, or pergola additions, which add $2,000–$8,000 depending on scope.
Our average Toronto-area deck project in 2025 ran approximately $16,500 for a 220 sq ft composite deck on a standard lot with poured concrete pier footings. That figure includes the permit fee and one revision cycle with the Building Division. It does not include landscaping restoration around the footing locations.
How Long Should a Toronto Deck Last?
A deck built correctly — proper footings below frost line, appropriate materials for the GTA climate, and all required permits pulled — should last 20 to 30 years with routine maintenance (Canadian Wood Council, 2023). That's not a guarantee against individual board replacement or railing touch-ups along the way, but the structure itself should remain solid for decades.
Decks that skip any of the three fundamentals rarely make it past year 5 to 7 without significant repair costs. The difference between a 5-year deck and a 25-year deck isn't luck. It's footings, materials, and paperwork.
Maintenance That Extends Deck Life in GTA Conditions
Annual maintenance matters in Toronto's climate. After each winter, check:
- Post bases and hardware for rust or looseness
- Decking boards for cupping, cracking, or soft spots (soft spots indicate rot)
- Railings for any lateral movement (shake them firmly — there should be none)
- The ledger board connection to the house, if the deck is attached
- Stair stringers for cracks at the notch cuts
For pressure-treated and cedar decks, applying a penetrating oil or water-repellent sealant every 1 to 2 years extends board life significantly. Composite decks need only annual washing with soap and water.
Frequently Asked Questions
Do I need a permit to build a deck in Toronto?
Yes. The City of Toronto requires a building permit for any deck that is attached to the house or has an area greater than 10 m² (approximately 108 sq ft) (City of Toronto Building Division, 2025). Decks over 600 mm (about 24 inches) above grade also require a permit regardless of size. Permit fees run $200–$500 for most residential projects. Building without a permit risks fines and mandatory removal.
How deep do deck footings need to be in the GTA?
The Ontario Building Code requires footings to extend below the frost line, which is 1.2 metres (approximately 4 feet) across the GTA (Ontario Building Code Division B, 2024). This depth applies in Toronto, Mississauga, Vaughan, Brampton, and surrounding areas. Footings that fall short of this depth are the leading cause of structural failure in GTA decks.
What's the cheapest decking material that will survive Toronto winters?
Pressure-treated lumber rated for ground contact (UC4B) is the most cost-effective durable option for Toronto's climate. Installed cost for a 200 sq ft deck runs $8,000–$14,000 in the 2026 GTA market. It requires annual sealing to achieve a 20+ year lifespan, but the upfront cost is roughly half that of composite decking. Avoid untreated SPF lumber for any exterior use in Ontario.
Can I build a deck myself in Toronto without a contractor?
Yes, homeowners can apply for their own building permits and build their own decks in Toronto. You'll need to submit drawings, pass a footing inspection before pouring concrete, and pass a final framing inspection. The risk is higher without construction experience, particularly around footing depth and structural connections. Most teardowns we've rebuilt were DIY projects where permit steps were skipped entirely.
How much does a deck cost in Mississauga or Brampton vs. Toronto?
Material costs are identical across the GTA. Labour rates in Mississauga and Brampton run roughly 5–10% lower than central Toronto due to travel and overhead differences. A 200 sq ft pressure-treated deck that costs $12,000–$14,000 in Toronto typically runs $11,000–$13,000 in Mississauga or Brampton. Permit fees vary by municipality: Mississauga and Brampton fees are generally comparable to Toronto at $200–$500 for residential decks.
The Bottom Line: Three Mistakes, One Rule
Getting a deck right in the GTA comes down to three decisions made before a single board is cut: pull the permit, go deep enough on the footings, and choose materials rated for Ontario's climate. Every teardown we've done could have been avoided if those three choices had been made correctly the first time.
The frustrating math of a failed deck is that the teardown and rebuild typically costs 1.5 to 2 times what the original correct build would have cost. A $10,000 deck built wrong becomes a $22,000 problem within 5 years.
If you're planning a deck in Toronto, Mississauga, Vaughan, or Brampton and want to get the fundamentals right from the start, our team at ATB Construction is available for a free on-site consultation. We've built decks across the GTA for years, and we're happy to walk through your lot, your soil, and your options before you commit to anything.
Tags
Related articles
Pick the Right Lumber and Fasteners for Outdoor Lighting or Pay the Price
Choosing the wrong lumber or fasteners for outdoor lighting setups can lead to costly failures. Learn what materials work best and which to avoid for lasting results.
Roofing in Toronto: Get It Done Before Mud Season Hits
The spring-to-mud-season window is the best time to replace or repair your roof in Toronto and the GTA. Learn 2026 CAD pricing, permit rules, and how to book before contractor slots fill up.
Why Most Outdoor Structures Fail After Two GTA Winters — And How to Stop It
After two winters in Toronto, the same failure patterns show up on decks, fences, and retaining walls across the GTA. Frost heave and wood rot are the culprits — and both are preventable with the right materials and build practices.